Final Deliverable
The "goods" (graphics and animations) are on our main
project page
Our final deliverable involved the following aspects:
1. Complete Scene
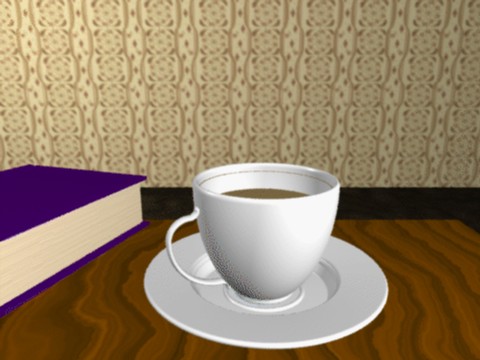
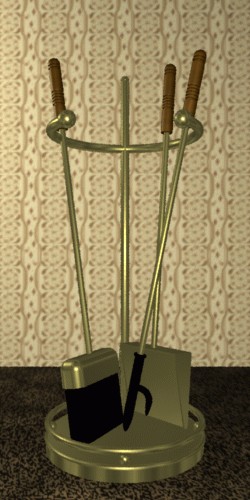
OK, so the chair, table, cup, saucer, throw rug, hearth, bookcase, carpet,
wall, book, firelogs and stand, and some really nice fireplace tools are
done. The steam and fire are dynamic and somewhat cool. The window and
water drops were tossed out, since they would require a higher resolution
image to be effective, and that would make for a slow animation... everything's
a tradeoff.
2. Animation of all dynamic elements
The fire burns, the steam steams. Life is good.
3. Optional extras
The fireplace tools and throw rug made it in, but not the cat or person..
sorry.
Writeup
Or, "How we made this all look easy, but it was really
hard"
We began this project by designing the scene and laying out where the objects
would lie. [See Figures 1 and 2]
This was easy. Then we located/made/modified the textures and shaders we
would use. These included the following:
- built-in carpet shader (for the carpet)
- built-in wood shader (table, bookcase, floorboard, fireplace tool handles, and fire wood)
- built-in metal shader (fireplace tools)
- built-in plastic shader (teacup and saucer)
- built-in matte shader (inside of fireplace, parts of fireplace tools, book on table, and log holder)
- built-in texturemap shader (wallpaper, books in bookcase, and pages of the book on the table)
- velvet shader we found on the web (for the chair)
- brick shader found on the web (fireplace)
- modified version of above brick shader to do the fireplace arch properly
- last minute shader for the throw rug to make it more interesting
- steam shader we made, based on a turbulence function found on the web
- fire shader found on the web and modified to be less yellow
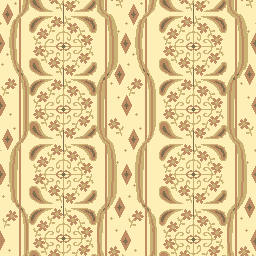
- wallpaper as a texture map which Dawn designed in xpaint
- pages showing in the book on the table we made
- books and more books
as a texture map for the bookcase (hey, they didn't need detail)
- rmannotes.sl, an include file required by some of the shaders
The bricks, probably gave the most grief. The
beautiful arch on the hearth you see was the
result of Dawn's tireless tinkering with polar coordinates and modifications
to the brick shader. Any way, we modeled all of the
objects, no trivial task, as some of my more interesting
mistakes show. So in the end we had the following objects:
All of the above items were modeled using constructive solid geometry of the
primitives sphere, disk, cylinder, cone, torus, paraboloid, and polygon (for
rectangular solids) as well as copius amounts of translation, rotation, and
some scaling.
and the following miscellaneous files:
- room -- the source which brings all of the
elements of the room together
- prism -- source for a rectangular solid
we used in many of the models
- steam -- the source for the dynamic
effects we used to model the teacup steam
- fire -- source for the dynamic effects we used
to model the fire in the fireplace
This done, we went on to work on the animation. The fire was modeled by
mapping a flame shader onto a bicubic patch mesh. With
each itteration, the patch mesh control points are randomly modified
(increased) until they exceeded a threshold, at which point they were dropped
back down to the lowest level. The lighting effects created by it were then
modeled by attaching the point light sources on the control points of the
mesh, (minus a constant to keep the mini-fireballs inside the firepit),
which varied in brightness and color based on their distance from the
"center" of the flame. The farther away from the center of the flame the
light source is, the redder the light color is and the lower the light
intensity is.
Unfortunately, we couldn't get shadow maps quite working, so
some of the lighting "features" around the fireplace are a little odd (for
instance, the glowing walls and distinct lack of cast shadows). In
order to do shadow maps for the fire, we would have to (since the lights
are point light sources) make six shadow maps (one for each direction) for
each of the 12 light sources in the fire for each frame of animation. Making
a shadow map involves moving the camera to the location of the light source,
which would be a great inconvenience and time suck to have to do this for
all the light sources, frames and directions.
To do the steam, we studied real steam effects by watching water boil. The
steam is also a bicubic patch mesh, based on a ranomized cone-ish shape.
There are two meshes: one that starts out high and one that starts out
low. Each mesh rises to a threshold level, at which point it falls to a
lower "start" level, while the other mesh still rises. This results in the
effect of constant steam rising to a point. The steam
shader then uses a turbulence function to determine the
transparency/translucency of the mesh at each point.
Dawn E., CS184-ax.
David B., CS184-ap.
cs184 Spring 97.